Collections
Managing Product Collections
Collections are group of products that you can showcase on your storefront. For example, you can group products on sale into an "On Sale" collection, which, once published, gets shown on a separate page on your storefront.
Published collections are accessible from links on your home page.
You can choose to save a collection as a draft, if you have not completed working on the collection yet. A 'draft' or 'unpublished' collection is not displayed on your store. A collection will only be displayed once it gets published.
- Adding a Collection
- Editing a Collection
- Filtering Collections
- Saving a Collection as a Draft
- Publishing a Draft Collection
- Unpublishing a Collection
- Deleting a Collection
Adding a Collection
To Add a Collection
- On your Admin panel, click Products>Add a Collection.
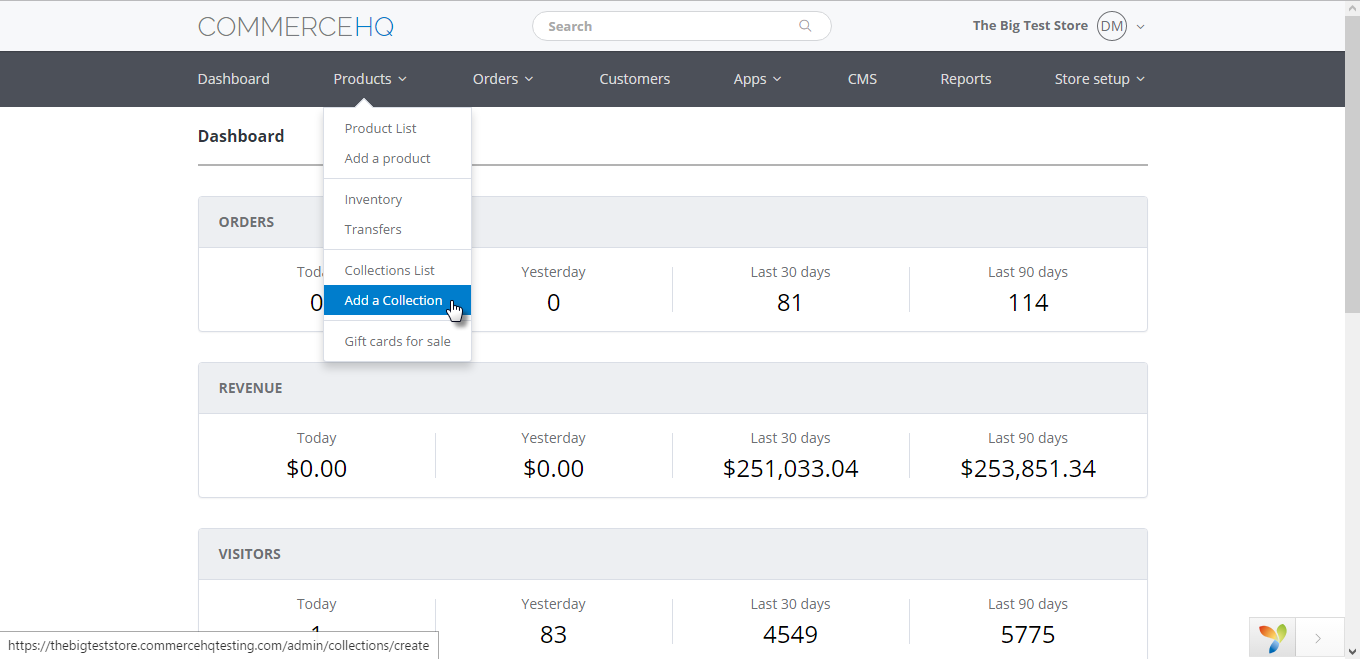
Click Products, then Add a Collection.
- Alternatively, click Products>Collections List, then click the Add a collection button on the top right of your Collections List.
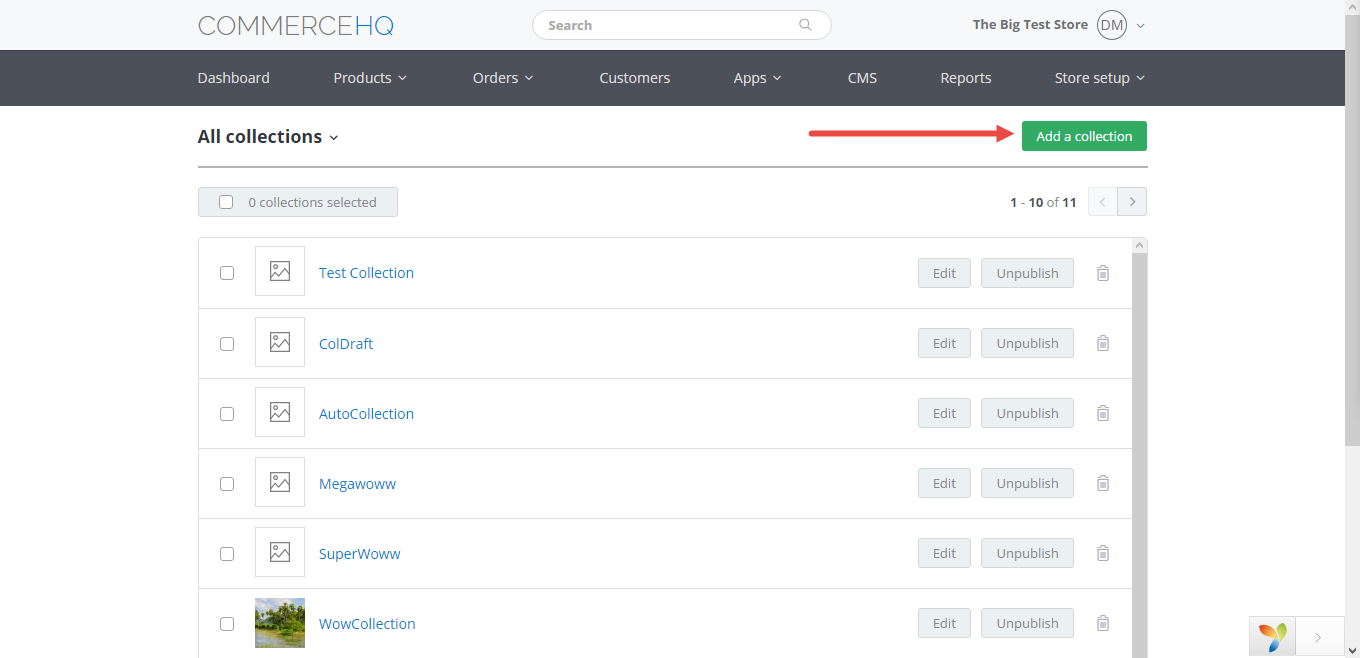
Open your Collections List, then click Add a collection
- On the Add a Collection page, enter a title for the collection. The title is displayed as the heading of the collection's page on your storefront.
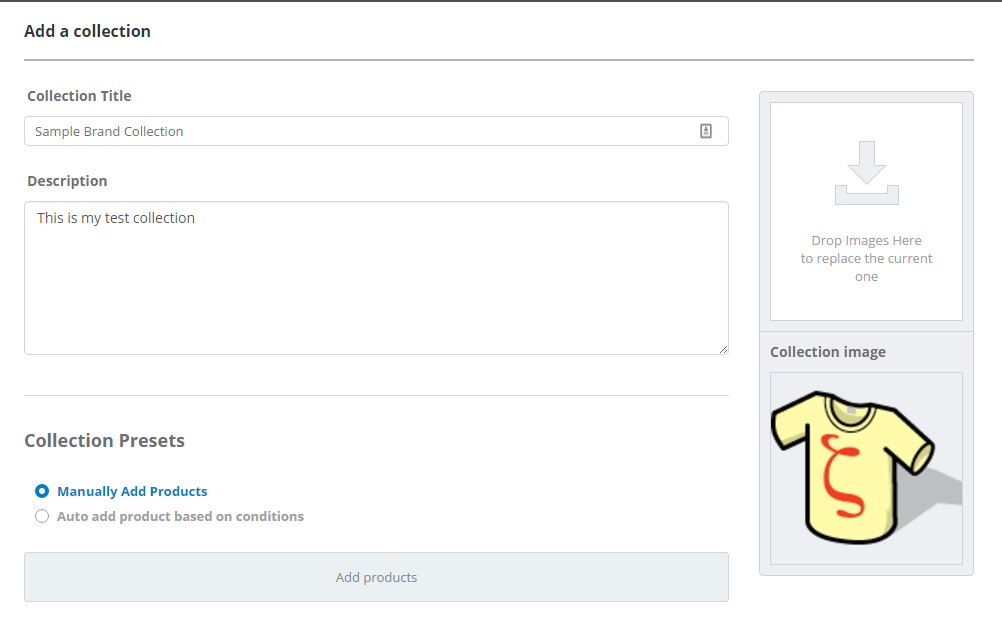
Enter a title and description for the collection, then upload a cover photo
- Optionally, enter a description and upload a cover photo for the collection using the Upload box on the right. You can also drag-and-drop a photo from your computer onto the box.
- On the Collection Presets section, the Manually Add Products option is selected by default. To auto-add products , click the Auto add product based on conditions option.

The Collection Presets section
To know more about manually adding products to a collection, see To Manually Add Products to a Collection.
To know more about auto-adding products to a collection, see To Auto-Add Products to a Collection.
- After adding products to the collection, you may optionally change the collection's page title for SEO purposes.
- Optionally, you may also set a meta description, and custom URL and handle.
- Click either Publish to publish the collection to your storefront, or Save Draft to save the collection for further editing later.
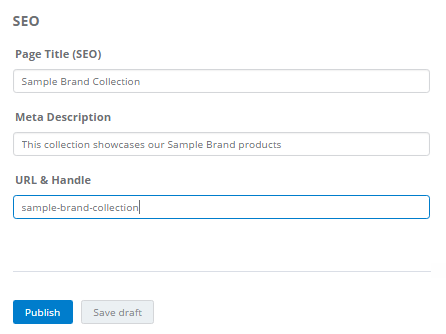
The Collection Page's SEO section
To Manually Add Products to a Collection
Manually adding products to a collection is the default option when creating a collection to showcase on your storefront (see To Add a Collection).
- On your Admin panel, click Products>Add a Collection.
- To manually add products, click the Add Products button right below the two Presets options, then either search for a product by entering its name on the Search bar, or select from among your existing products on the pop-up window. You can select as many products as you want.
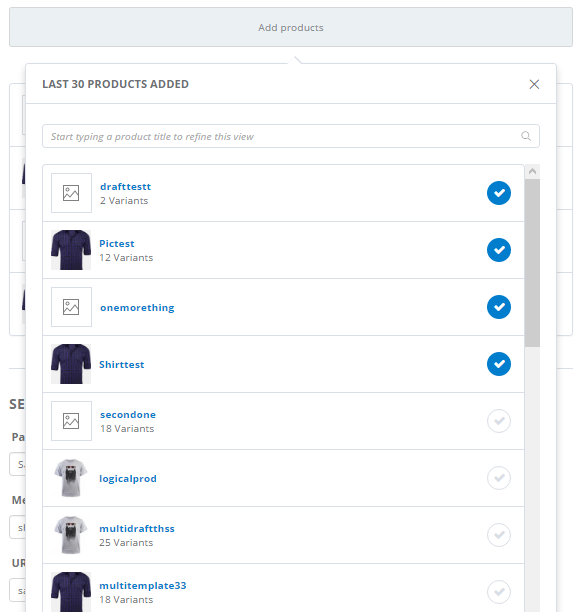
The Add Manual Products Box
- If your collection already has automatically added products (see To Auto-Add Products to a Collection), clicking the Manually Add Products option will display a warning message that switching options will delete all existing products in the collection. Click either Confirm to continue with the operation, or Cancel to stop the operation.
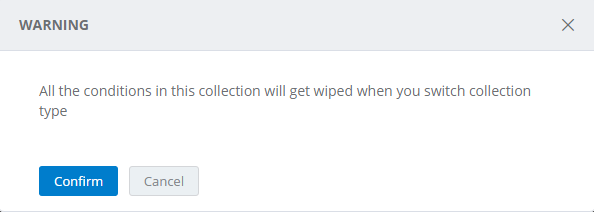
Click Confirm to proceed with, or Cancel to stop switching the collection type
- Once done, click the Close or X icon on the pop-up window. The added products are displayed on a table back on the Collections page.
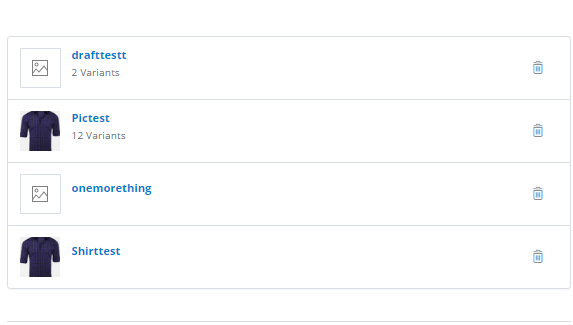
Added products are displayed on a grid in between the Collection Presets and SEO sections of the Collection page
- Click either Publish to publish the collection to your storefront, or Save Draft to save the collection for further editing later.
To Auto-Add Products to a Collection
If you have a hundred or so products in your inventory, manually adding them to a collection may prove daunting. To make it easier for you, we added an option that allows you to automatically add products to your collection.
- On your Admin panel, click Products>Add a Collection.
- To auto add products based on your own custom conditions, click the Auto add product based on conditions option.
If your collection already has manually added products (see To Manually Add Products to a Collection), clicking the Auto add option will display a warning message that switching options will delete all existing products in the collection. Click either Confirm to continue with the operation, or Cancel to stop the operation.
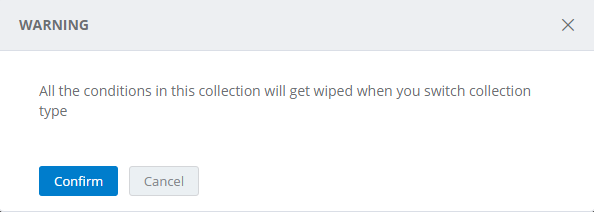
Click Confirm to proceed with, or Cancel to stop switching the collection type
- Set the filter to match just one condition or all of the conditions, then set the conditions for product selection.
As an example, the screenshot below shows the conditions for putting all shirts from Vendor 1 in a "Vendor 1" collection.
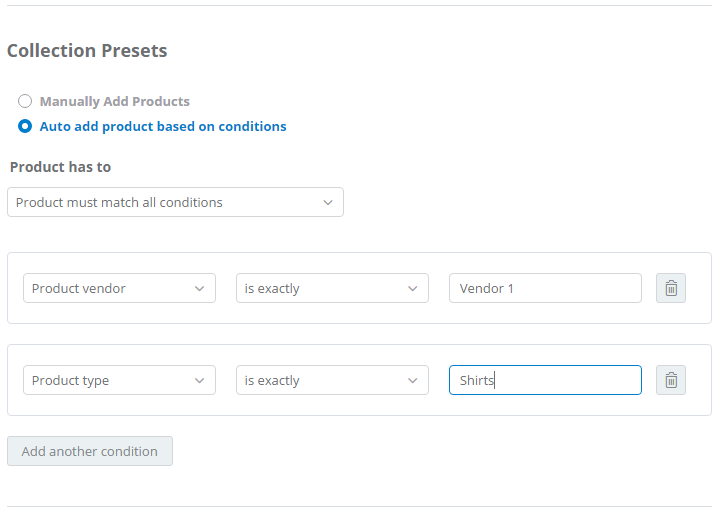
Set a "Product vendor is exactly Vendor 1" condition and a "Product type is exactly Shirts" condition, then click Save
- Click either Publish to publish the collection to your storefront, or Save Draft to save the collection for further editing later. Either way, CommerceHQ starts pulling all products that meet your conditions into the collection.
Editing a Collection
- On your Admin panel, click Products>Collection List.
- On your Collections List, click either the name of the collection to be edited, or the Edit button to the right of the collection.
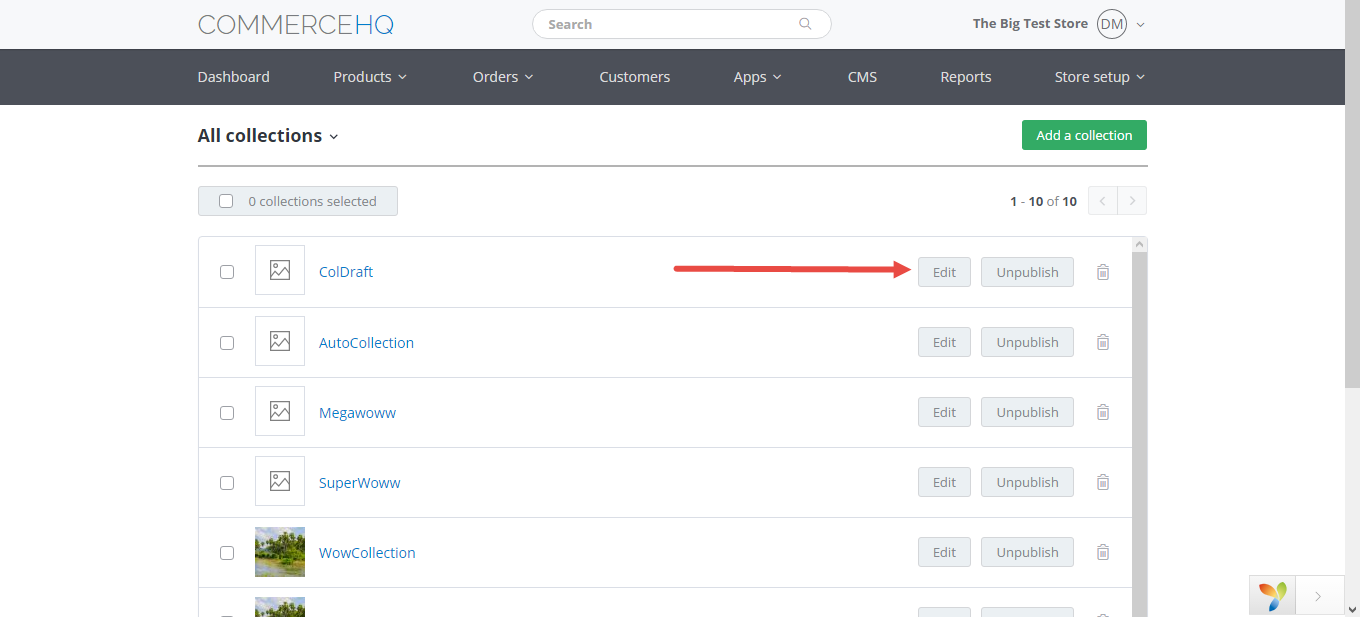
Click the Edit button to open the Collections page for editing
- On the Collections page, make your changes to the collection, then click Save.
Filtering Collections
By default, the Collections List displays all your product collections, regardless of status (published or unpublished) or type (manual or auto-added). The collections are sorted by descending order. with the latest created collection on your store showing first. You can apply a filter on the Collections List to display only certain collections.
To Filter Collections
- On your Admin panel, click Products>Collections List.
- When the Collections List opens, click the All collections link on the top left.
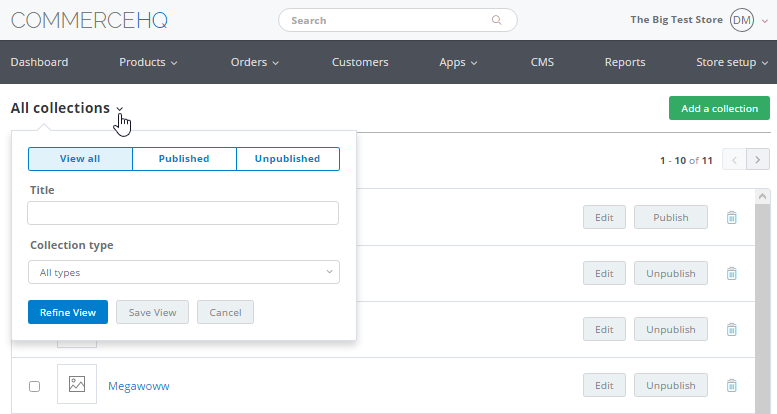
Click the All collections link on the top left
- Filter your collections by status (Published or Unpublished), title, or type (Manual or Auto Collection).
- Click Refine View. The orders that meet the filter criteria you entered in Step 3 above are then displayed on the screen.
To Reset a Filter
Click Reset to reset the filter to the default All Collections view.
To Save a View
Views of collections to which filters have been applied can be saved. These saved views can then be used to filter the Collections List in the future.
- Filter the Collections List (see To Filter Orders).
- Click Save View to add to your list of saved views.
To Run a Saved View
- Click the All Orders link at the top of the Orders page.
- Click a saved view from your list of saved views.
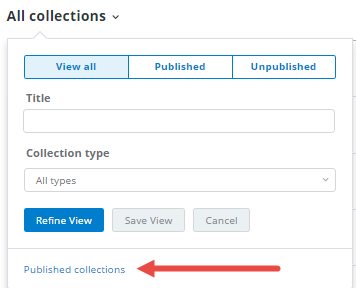
Click a saved view from the list
Saving a Collection as a Draft
When adding a collection, you can save it as a draft first, specially if you plan to add more products to it later, or if you just want it to be ready for publication at the proper time. Saving as draft does not publish the collection to your storefront.
To save a collection as a draft, after entering the details for the collection (see Adding a Collection), click the Save as draft button.
You will know a collection is a draft if you see a Publish button to the right of the collection.
To publish a draft collection, see Publishing a Draft Collection.
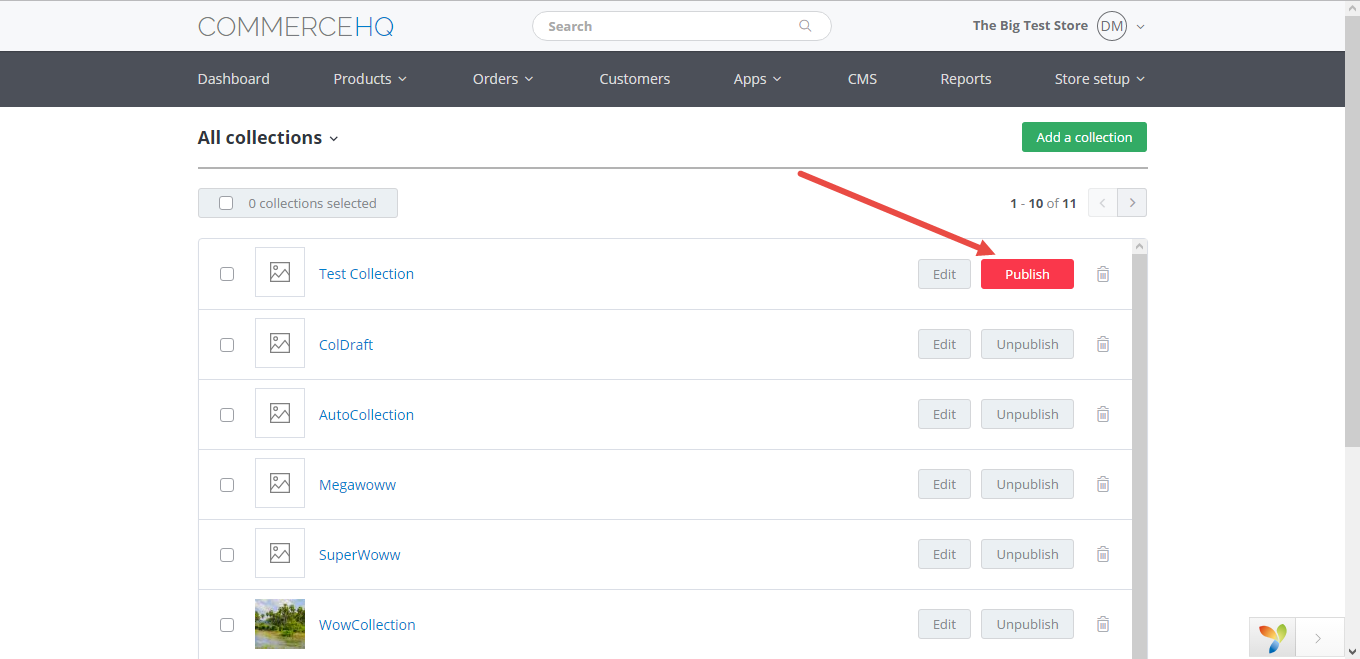
A Publish button to the right indicates that the collection is a draft
Publishing a Draft Collection
To Publish a Single Draft Collection
- On your Admin panel, click Products>Collection List.
- On your Collections List, look for the draft collection you want to publish. You will know a collection is a draft if you see a Publish button to the right, in between the Edit and Delete buttons. Click the Publish button to publish the collection to your storefront.
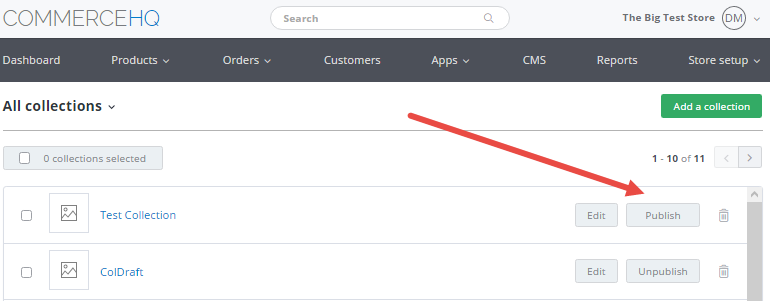
Click the Publish button to save a draft collection
To Publish Multiple Draft Collections
- On your Collections List, check the boxes to the right of the draft collections to be published.
- On the top of the Collections List, a box appears showing the number of collections you selected in Step 1, together with an Action box. Click the Actions box, then select Publish to publish the selected draft collections to your storefront.
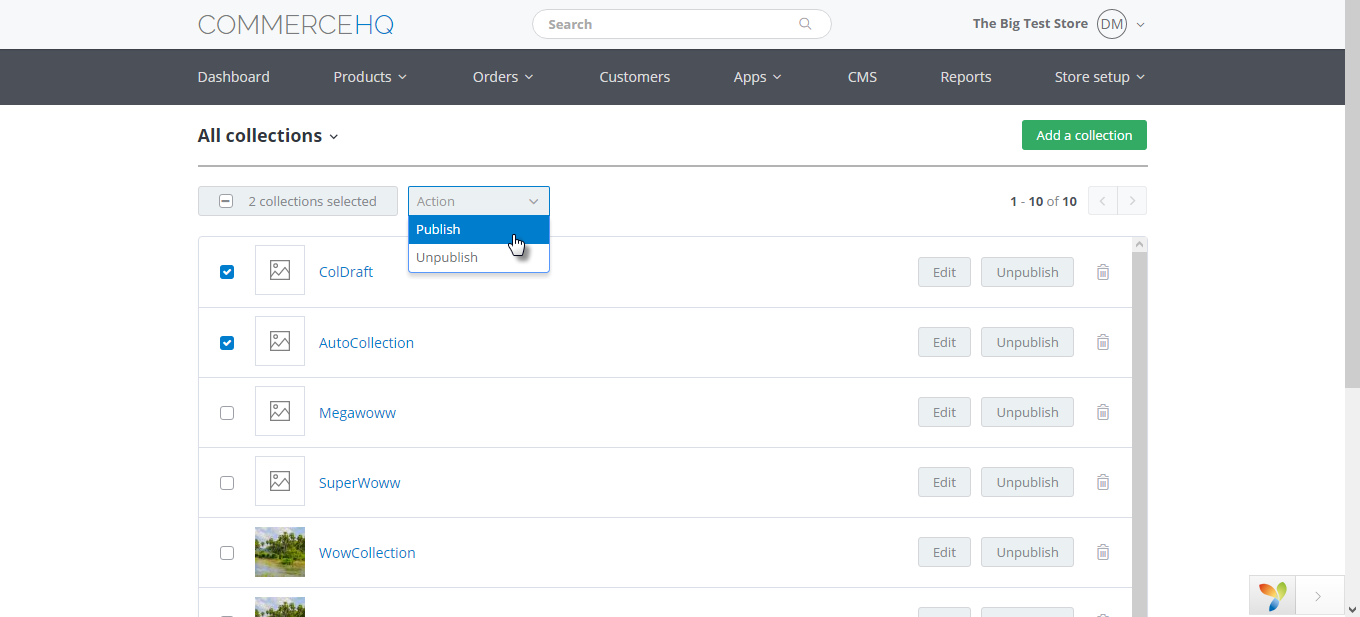
Select two or more draft collections, then click Publish on the Actions menu
Unpublishing a Collection
Unpublishing a collection is less drastic than deleting it - you can publish the collection again in the future. The link to the collection on your home page is removed, though, and the collection page itself will no longer be visible to your customers, once it is unpublished.
To Unpublish a Single Collection
- On your Admin panel, click Products>Collection List.
- On your Collections List, look for the collection to be unpublished, then click the Unpublish button to the right, in between the Edit and Delete buttons.
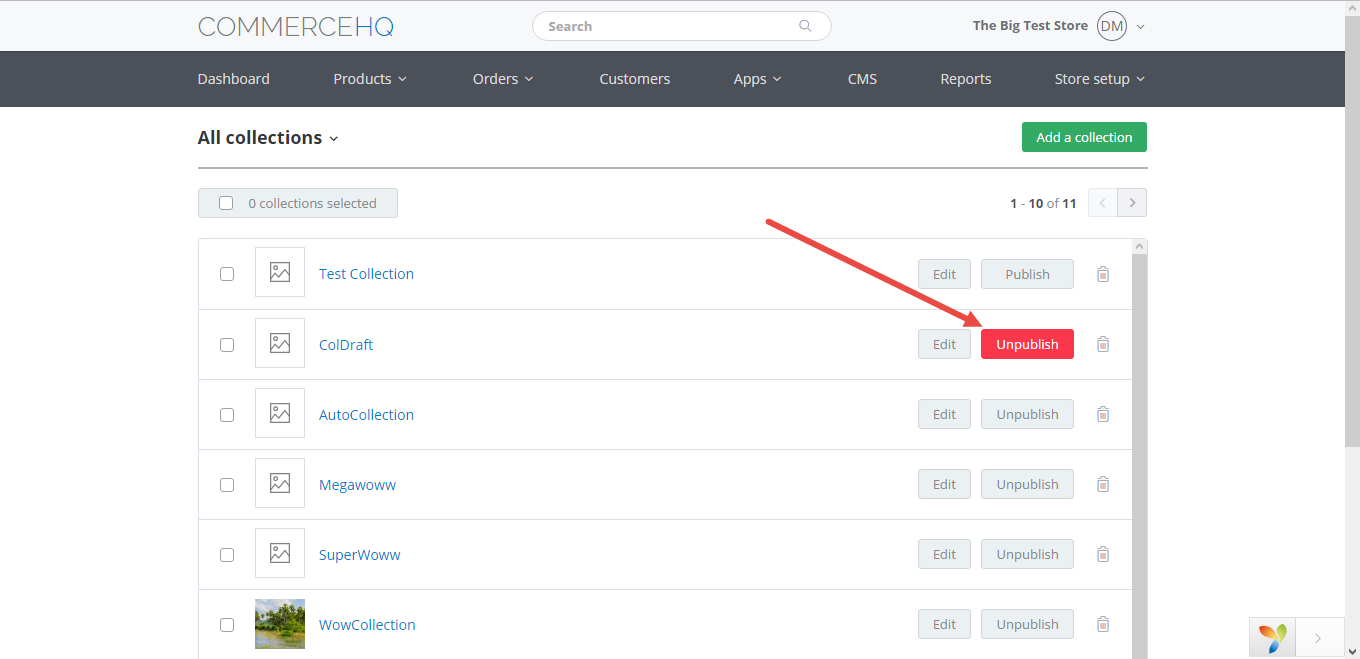
Click the Unpublish Button
To Unpublish Multiple Collections
- On your Collections List, check the boxes to the right of the collections to be unpublished.
- On the top of the Collections List, a box appears showing the number of collections you selected in Step 1, together with an Actions box. Click the Actions box, then select Unpublish to remove the selected collections from your storefront.
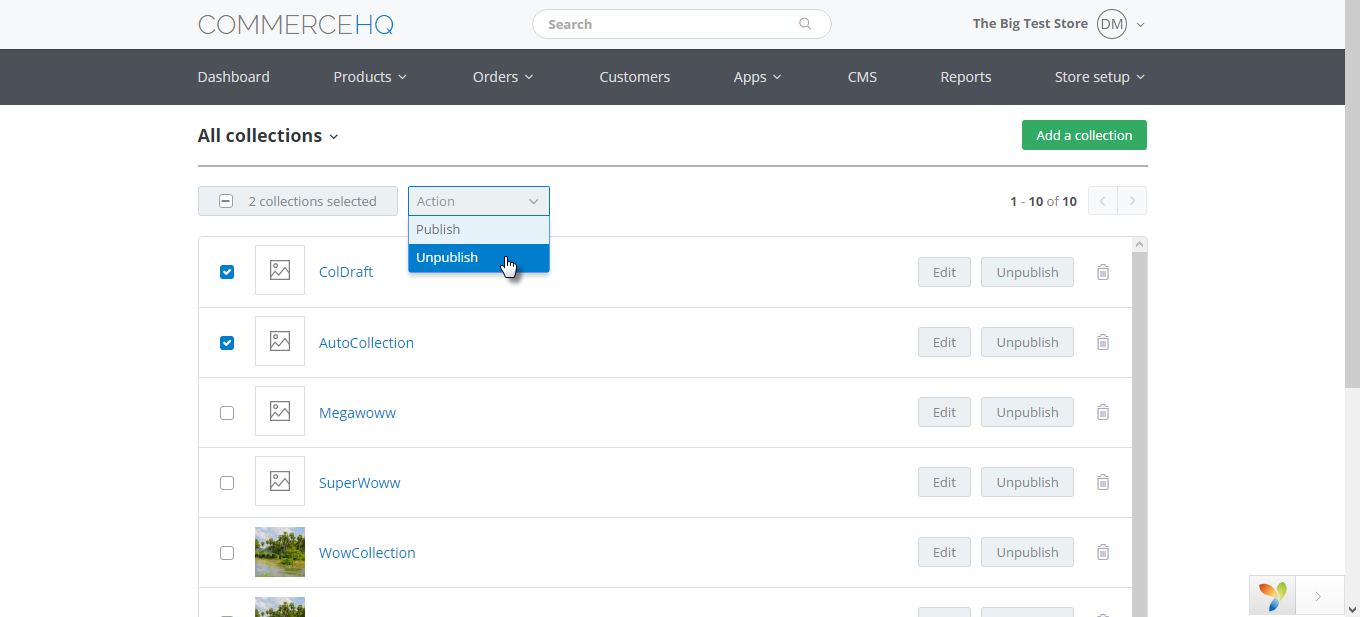
Select two or more collections, then click Unpublish on the Actions menu
Deleting a Collection
You may delete collections you no longer need, particularly if you do not see any further need for them in the future. Deleting a collection removes the link to the collection on your home page as well as the collection page itself.
- On your Admin panel, click Products>Collection List.
- On your Collections List, click the Delete button to the right of the collection to delete the collection.
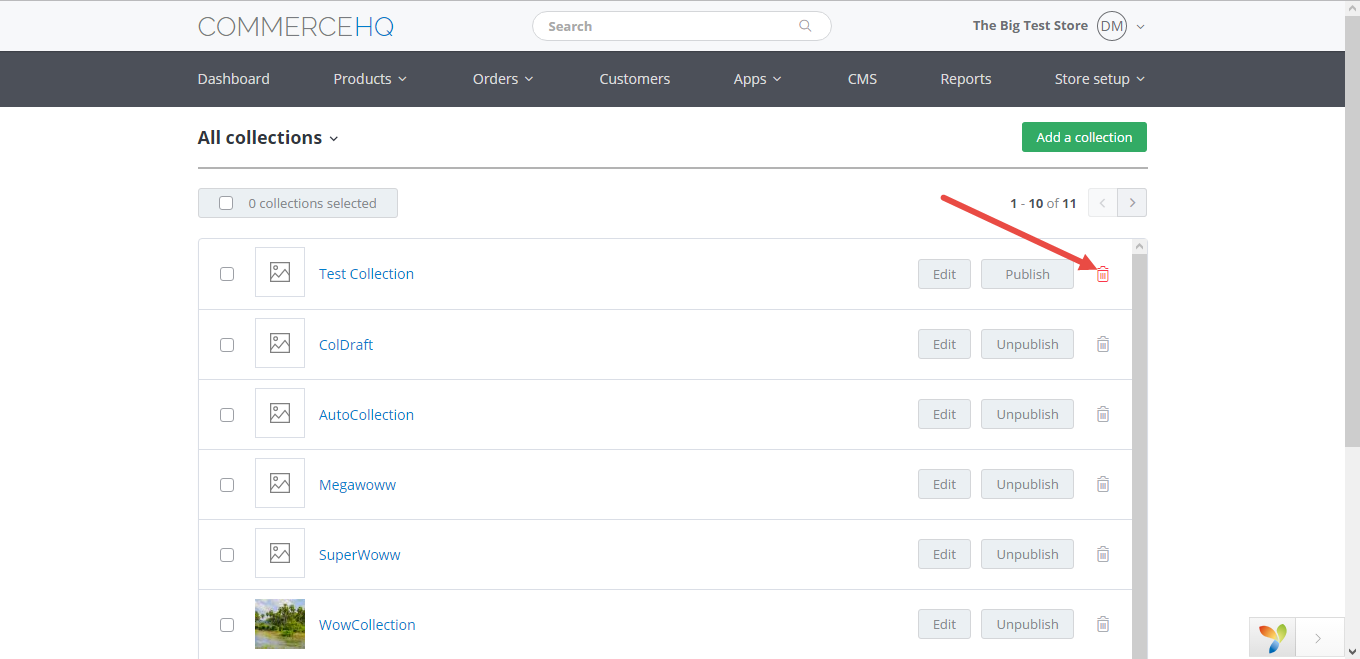
Click the Delete button
Updated over 6 years ago
