Customers
Managing Your Customers
The Customer List is accessible from the Customers menu on your Admin panel. It shows all customers that have purchased something from your store, or have abandoned their shopping carts while they were browsing through your store. Each line on the Customer List corresponds to a customer profile - clicking on a record on the Customer List opens the corresponding customer profile.
Viewing the Customer List
By default, the Customer List shows all your customers, but you can refine this view to suit your purposes. For example, if you are searching for a customer, you can create a filter that looks for the customer's full name so that only that particular record is displayed on the Customer List.
To Filter the Customer List
- On your Admin panel, click Customers.
- On the Customer List, click the All customers link at the top to display the Refine view box.
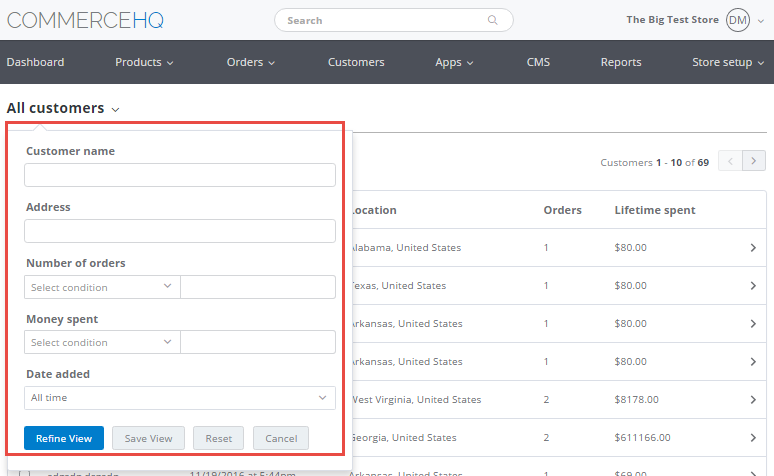
The Refine View box
- Filter by customer name, address, number of orders, money spent, and date added, then click Refine View.
The number of orders can be equal to, more than, or less than the number you enter on the box to the right.
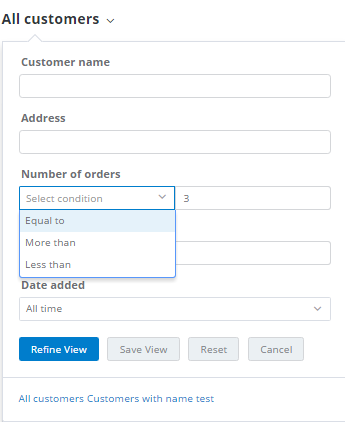
Select a condition to filter by number of orders
Filtering by money spent works the same as filtering by number of orders, except that you enter an amount rather than a number.
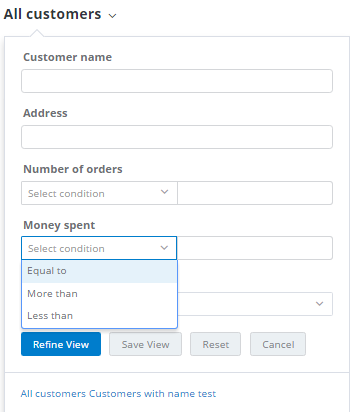
Select a condition to filter by money spent
The date added can be any date range, or any customer record added from the time you started operations until the current date, with a number of choices in between.
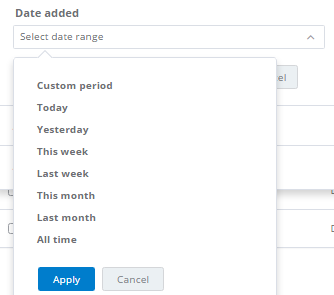
Filter Customers by Date Added
To filter by date range, click the Date added box, then Custom period, then select the inclusive dates on the two boxes.
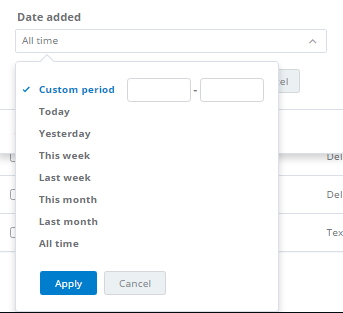
Enter the inclusive dates on the custom period box to filter by date range
- Click Refine View to carry out the filter operation. The Customer List is then refreshed, showing only the records that meet the criteria of your newly-defined filter.
To Save a Custom View
You can save a custom view generated from a filter you define for the Customer List so that you can use it the next time you need it.
- On your Admin panel, click Customers.
- On the Customer List, click the All customers link at the top to display the Refine view box.
- Follow the procedures in To Filter the Customer List to generate your custom view, then click Save View to add it to your list of saved views.
To Run a Saved View
To run a saved view, open the Refine View box, then click a saved view from the list at the bottom.
To Reset to the Default View
To reset the view to the default All Customers view, click Reset.
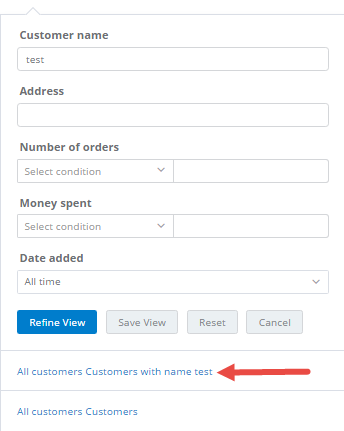
Click a saved view from the list
Viewing a Customer's Profile
The Customer Profile acts as a dashboard for the customer and displays summarized data and links to all orders.
To View a Customer's Profile
- On your Admin panel, click Customers.
- On the Customer List, click the customer record you want to view.
- On the Customer Profile, the customer's order history is sorted from newest to oldest. The order history shows the date and time, payment and shipping status, and the total amount of each order. The customer's lifetime spend, or the combined total of all orders made by the customer from your store, is also displayed, as well as the customer's shipping and billing addresses, email address, contact number, and payment details. You can also enter notes about the customer, and view the tags of the products that the customer ordered from your store.
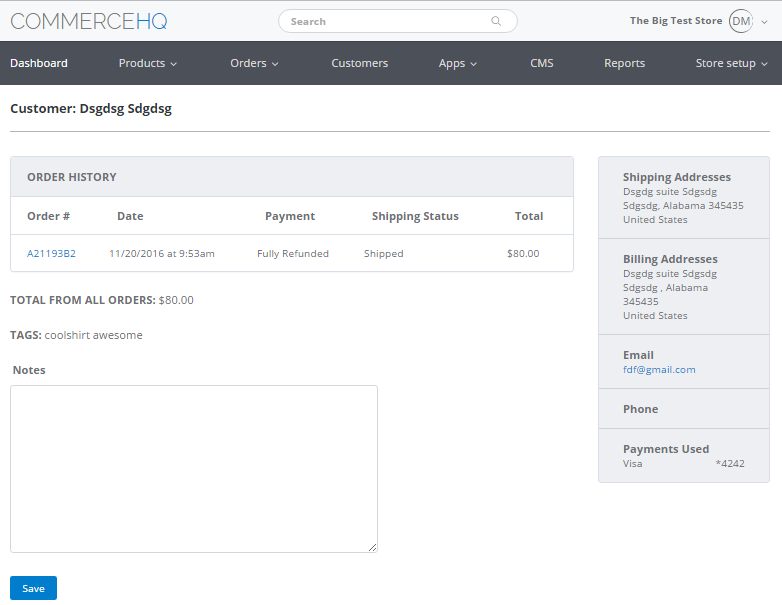
The Customer Profile
To Add a Note to a Customer's Profile
On the Customer Profile, enter your notes for the customer on the Notes box, then click Save.
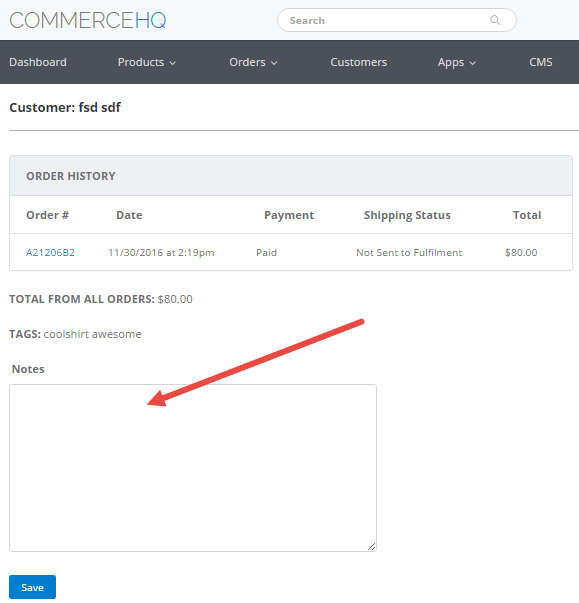
Enter your notes for the customer, then click Save
To Send an Email to a Customer
On the Customer Profile, click the email address on the right. This opens your default email client with the customer's email address already on the Recipients list.
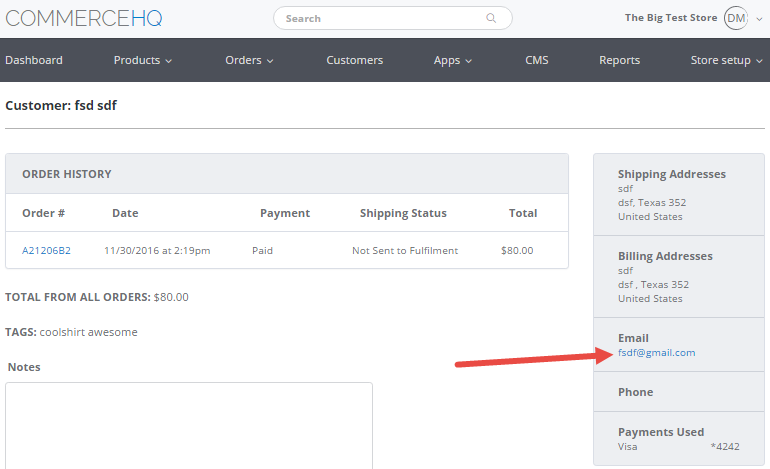
Click the email address
Viewing a Customer's Order Details
To know more about the details of an order on the Customer Profile, click the order number to open the Order Details page. Here, you can edit the order's shipping status, process refunds, and print the order details. To know more, see the Orders section of this user manual.
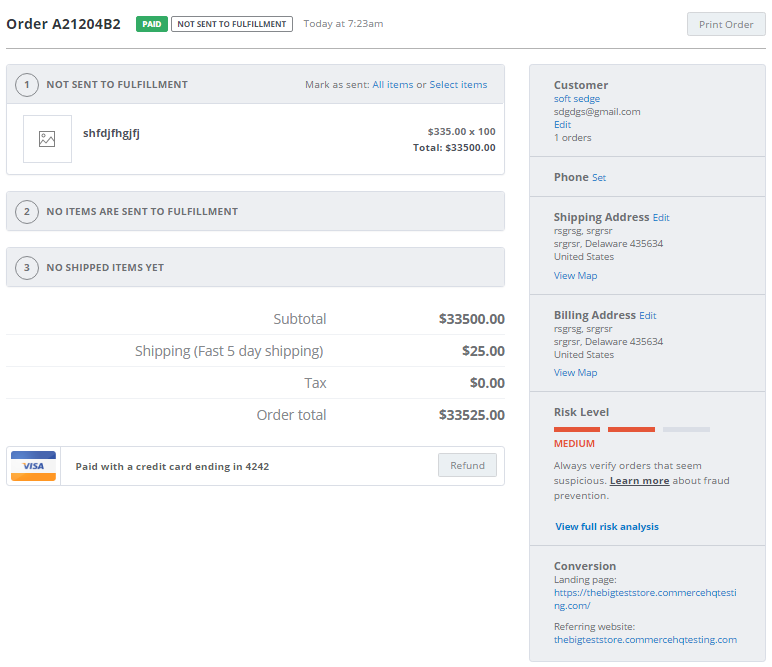
The Order Details page
Updated almost 7 years ago
