Domains
This article will show you how to manage, add and remove domains to your stores.
If you wish to register a new domain via ecommercehq we can do this for you thru namecheap.
DNS registration is done via DNS made easy.
Domains List & Dashboard
To access the domains list follow the steps below:
1. From the dashboard click Store setup

Navigation
2. Then click Domains
The Your domains page displays.

| Screen Element | Description |
|---|---|
| Status and Domain | Status light (GREEN or RED) indicates if the domain is connected or not. Next to status light is the domain name. |
| Make Primary hyperlink | Make primary button sets the domain to be the main domain of the store (only available if more than one domain is active.) |
| Renewal button | Renewal button pops up the domain renewal pop-up. |
| Cog button | Gear button pops up the DNS settings pop-up |
| Delete button | Deletes the domain. |
Renewal Popup
Date range: shows the date the domain was registered and when it expires.
Auto-renew: renews the domain automatically 1 week prior to expiry for 1 additional year.
Add years: activates a dropdown that you can use to select up to 5 years - when save is clicked you will be redirected to a payment confirmation page.
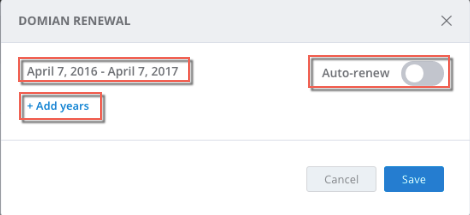
DL note: Unable to recapture this in test env
DNS Settings
Select if the primary domain works via www. or without it.
Add/edit/remove MX records
Add/edit/remove TXT records
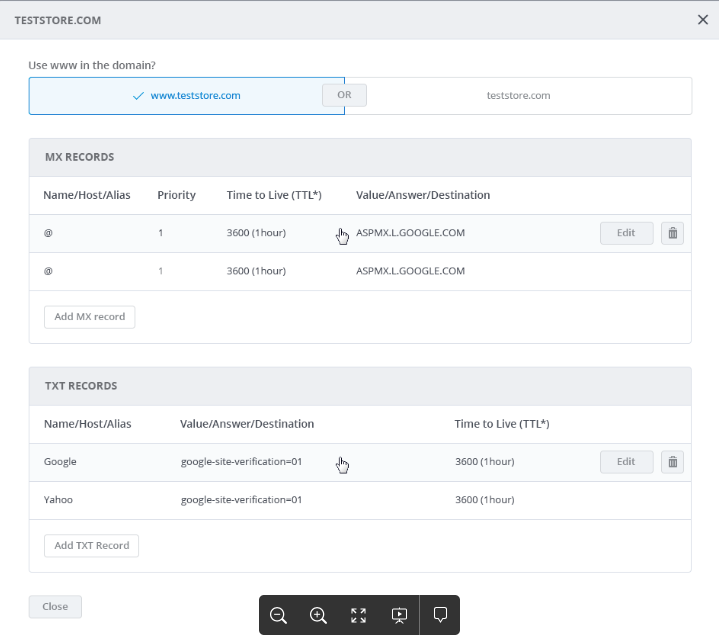
DNS Settings Active Edit Mode
Select if the primary domain works via www. or without it.
Add/edit/remove MX records
Add/edit/remove TXT records
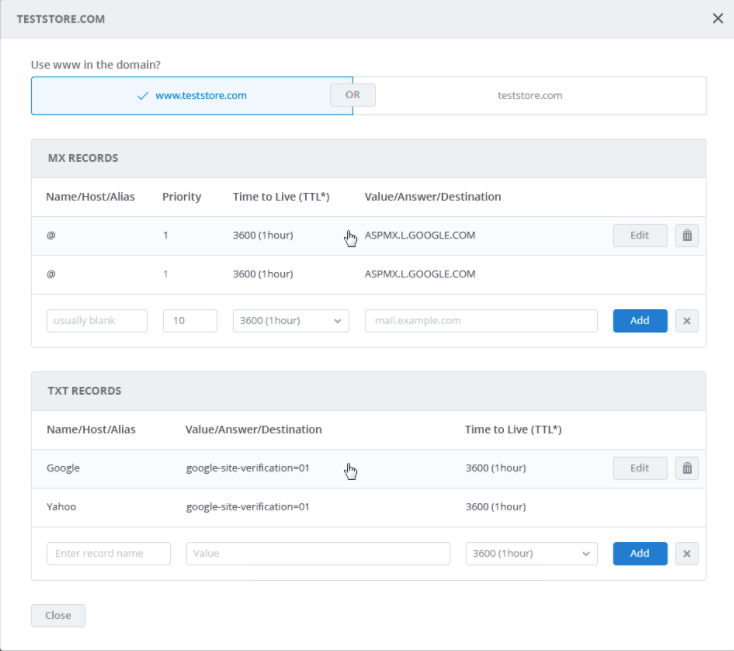
Connect Existing Domain
You can use this page to connect a domain purchased outside of commercehq and connect it by pointing it to our name servers.
To connect and existing domain follow the steps below:
1. From the Your domains page click Connect existing domain

The Connect existing domain page displays.
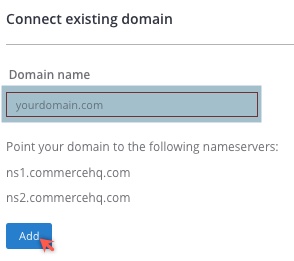
2. Enter your Domain name
3. Click Add
Buy New Domain
To purchase a new domain via ecommercehq follow the steps below:
1. From the Your domains page click Buy new Domain
The Buy a domain page displays.
2. Check availability by entering your desired domain name and extension. The look-up is done via the namecheap API.

3. Click Check availability
4. Once you find a domain that is available the system displays the price.
Domain Pricing
This price is exactly what namecheap charges us and these prices are updated with the maintenance script.
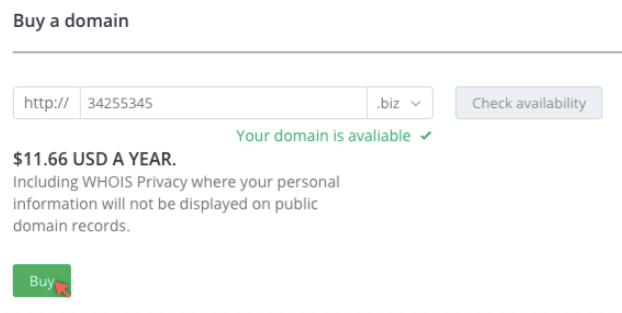
Buy Domain
5. Click Buy
The Buy domain page displays
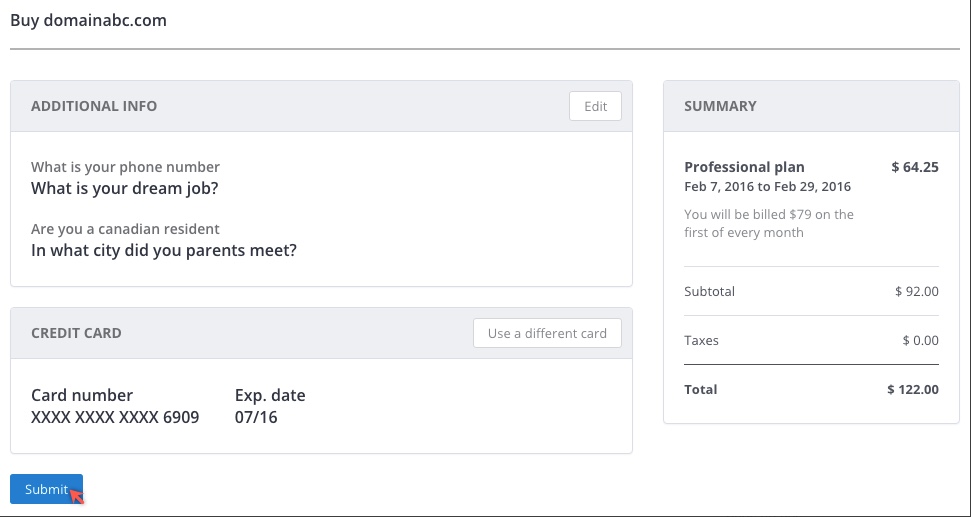
Payment Details
7. Verify the ADDITIONAL INFO required for registration and Edit if required
8. Review credit card information - you can optionally Use a different card
9. Click Submit
Updated over 6 years ago
