Transfers
Managing Transfers
Transfers are a bulk way to add stock to your store when you receive new shipments from suppliers. You can also use this feature to transfer stock from one of your warehouses to another warehouse.
Inventory transfers from a warehouse to another warehouse, or from a supplier to a warehouse, are tracked on the Transfers page, which is accessible from Products>Transfers.
Before you can transfer stock from a warehouse or supplier to another warehouse, you have to add a warehouse first. Warehouses can be added from the Transfers page as well.
- Creating Your First Transfer
- Adding Warehouses or Suppliers
- Manually Adding Products for Transfer
- Adding Products for Transfer via CSV File
- Editing an Existing Transfer
- Receiving Transferred Items
- Filtering Transfers
- Archiving a Transfer Record
- Unarchiving a Transfer Record
- Deleting a Transfer Record
Creating Your First Transfer
If you have not transferred stock before, clicking Products>Transfers will take you to an empty Transfers page, where you will be asked to create your first transfer.
- Click Create My First Transfer.
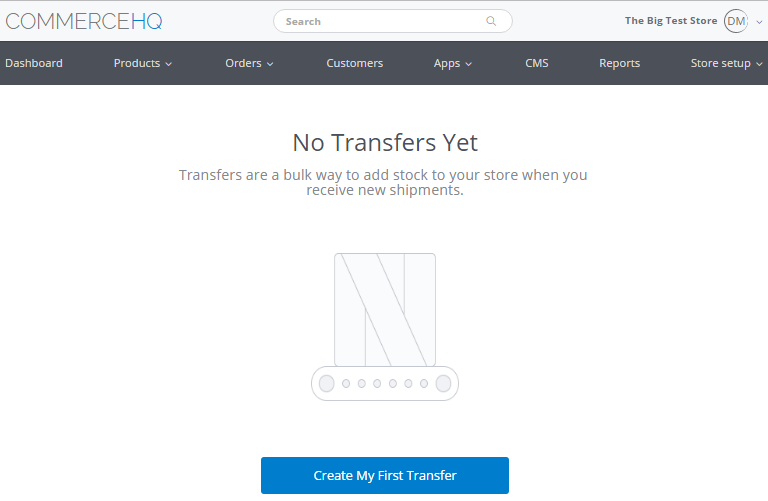
Click Create My First Transfer
- On the New Transfer page, select the source warehouse or supplier on the From list, then select the receiving warehouse on the To list.
If you have not added a warehouse or supplier yet, you may do so from the Transfers page as well. For more information, see Adding a Warehouse or Supplier.
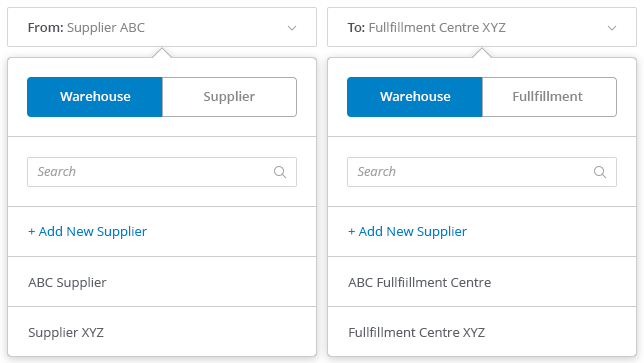
Select the source and receiving warehouses
- Click Add Items.

Click Add Items
- On the Add Items page, you can either manually transfer items or upload a CSV file in the prescribed two-column format (SKU code + Number of Items).
For more information on manual inventory transfer, see Manually Adding Products for Transfer.
For more information on using a CSV file to transfer inventory, see Adding Products for Transfer via CSV File. - Click Done to start the transfer process.
To transfer more stock, repeat Steps 3-5. - Back on the Transfers page, click Save.
Adding Warehouses or Suppliers
- On the Transfers page, if the transfer is new, click the Add a transfer button on the top right.
If you are editing an existing transfer, click the menu to the right of the transfer record, then click Edit.
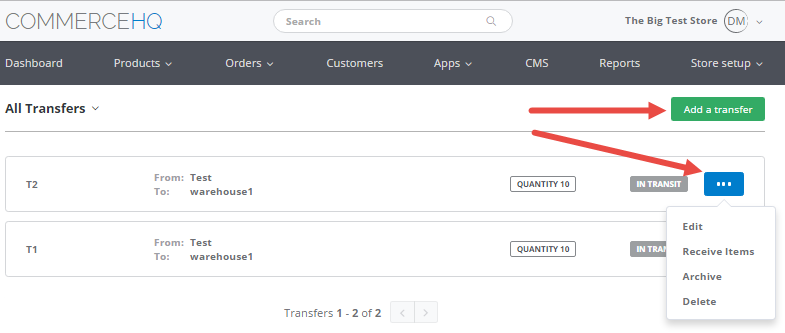
Click Edit
If the stock will originate from a new warehouse or a new supplier, go to Step 2. If the stock will be sent to a new warehouse, skip to Step 3.
- On the Transfer Details page, select the From box, click Add New Warehouse.
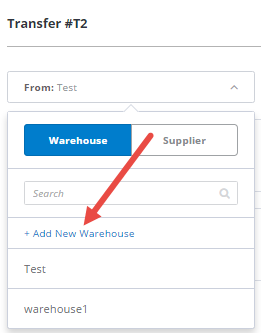
Click Add New Warehouse on the From box
To add a new supplier instead, click the Supplier tab, then Add New Supplier. Skip to Step 4.
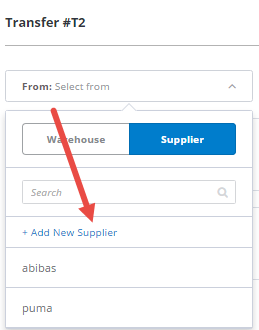
Click Add New Supplier on the From box
- On the Transfer Details page, select the To box, then click Add New Warehouse.
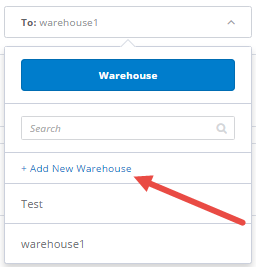
Click Add New Warehouse on the To box
- Enter the name of the new warehouse or supplier, then check the icon to the right to save the warehouse.
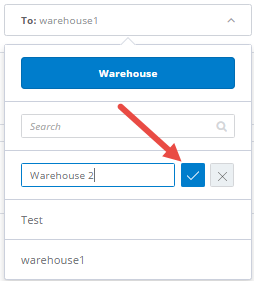
Enter the name, then click the Checkmark icon to save your changes
Manually Adding Products for Transfer
Product transfers from from one warehouse or supplier to another may be done manually when creating new or editing existing transfers.
- When adding new or editing existing transfers (see Creating Your First Transfer and Editing an Existing Transfer), the Manually tab is selected by default on the Added Items page.
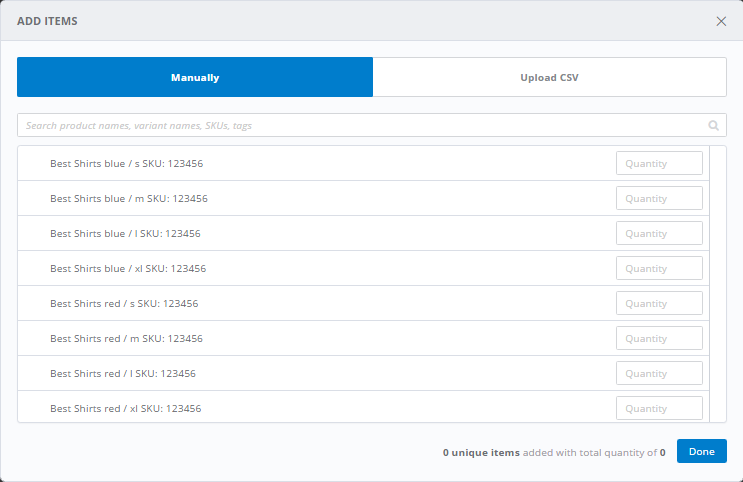
The Manually Add Products tab
- Search for the transfer record to add new stock to, then enter the quantity to be added on the box to the right.
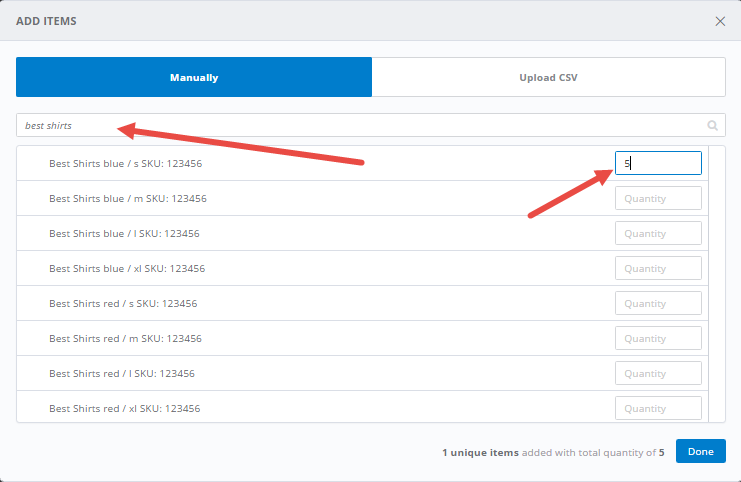
Search for the transfer record, then enter the quantity to be added
- Click Done.
Adding Products for Transfer via CSV File
Product transfers from from one warehouse or supplier to another may also be done via CSV file when creating new or editing existing transfers.
-
When adding new or editing existing transfers (see Creating Your First Transfer and Editing an Existing Transfer), click the Upload CSV tab on the Added Items page.
-
Search for the CSV file from your computer, or drag and drop the CSV file to the Upload CSV tab.
-
Click Done.
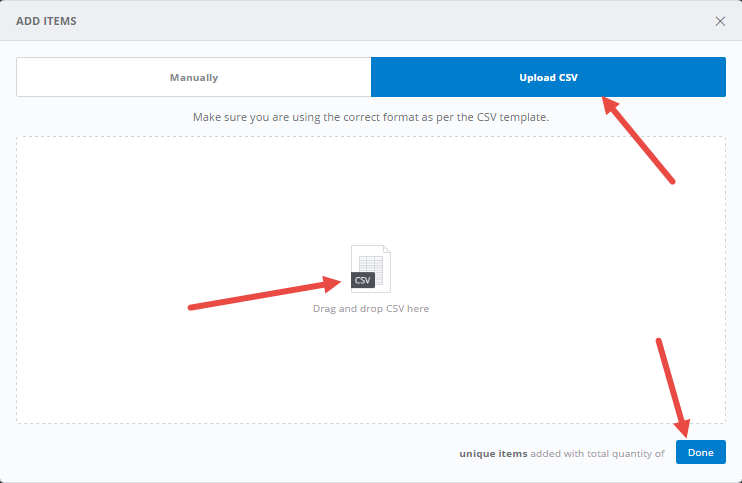
Click the Upload CSV tab, drag and drop the CSV file, then click Done
Filtering Transfers
By default, the Transfers page displays all your transfers. The transfers are sorted by descending order. with the latest transfer entered showing first. You can apply a filter on the Transfers page to display only certain records.
To Filter Transfers
- On your Admin panel, click Products>Transfers.
- To apply a filter on the list, click the All Transfers link at the top.
- By default, all transfers are displayed on the Transfers page. You may filter this by either Archived or Non-archived status, transfer status, transfer from (supplier), transfer from (warehouse), transfer to (warehouse), and transfer ID.
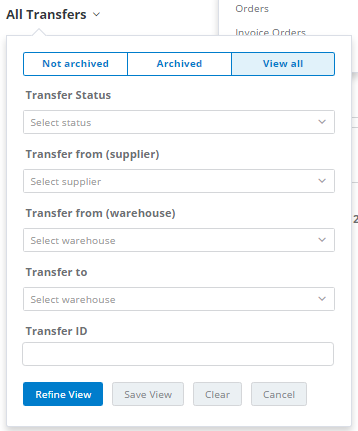
Filtering Transfers
- Click Refine View. The records that meet the filter criteria you entered in Step 3 above are then displayed on the screen.
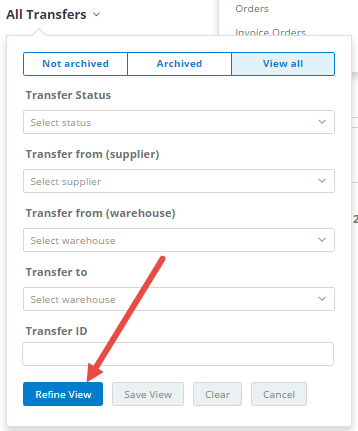
Click Refine View
To Save a View
Views of transfers that have been filtered can be saved. These saved views can then be used to filter the Transfers page in the future.
- Filter the Transfers page (see To Filter Transfers).
- Click Save View to add to your list of saved views.
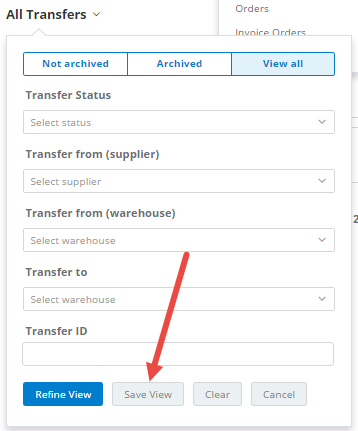
Click Save view
To Run a Saved View
- On your Admin panel, click Products>Transfers.
- Click the All Transfers link on the top left, then click a saved view from the list.
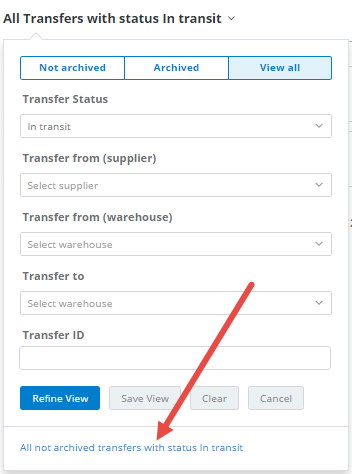
Click a saved view
To Reset a Filter
Click Clear to reset the filter to the default All Transfers view.
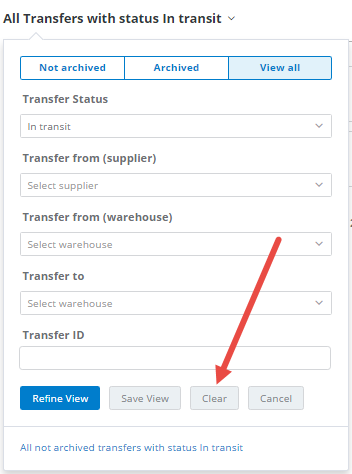
Click Clear to reset the filter
Editing an Existing Transfer
- On the Transfers page, look for the Transfer record to be edited, click the rightmost button, then click Edit.
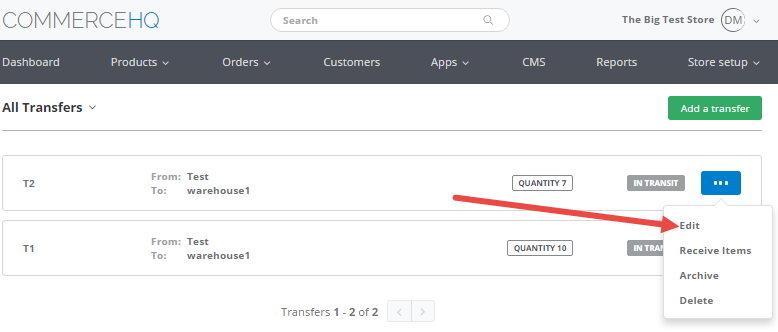
Click Edit
- On the Transfer Details page, enter the quantity to be added or removed from the transfer, then click Save.
When you go back to the Transfers page, the new quantity for transfer is reflected on the Transfer record.
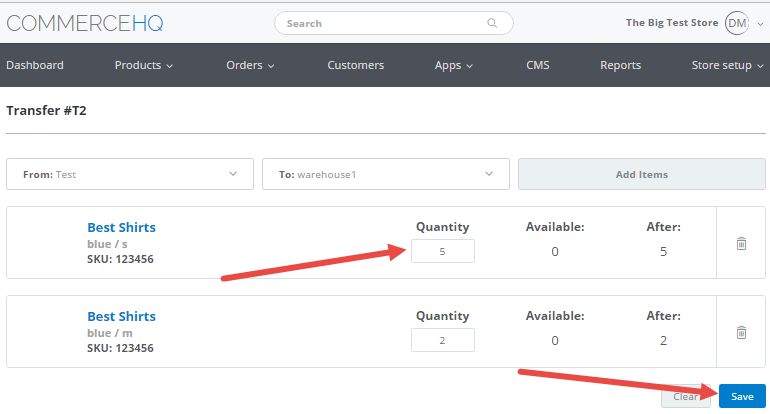
Enter the quantity, then click Save
Receiving Transferred Items
- On the Transfers page, look for the Transfer record for which items will be received, click the rightmost button, then click Receive items.
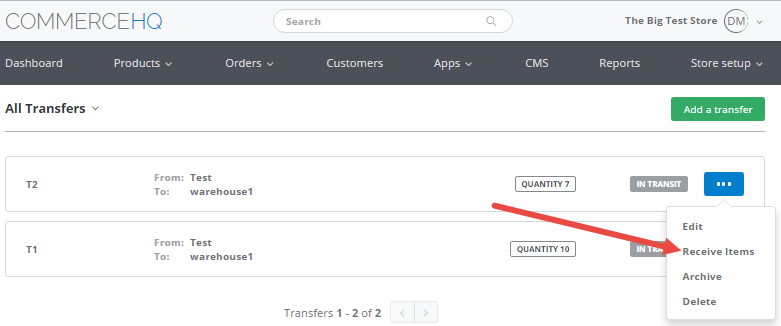
Click Receive items
- On the Receive Transfer page, if the number of items for transfer is not complete yet, enter the number of items on the Marked as received boxes of the transfer record. Otherwise, to receive all transferred items, click the Receive all items button on the top right.
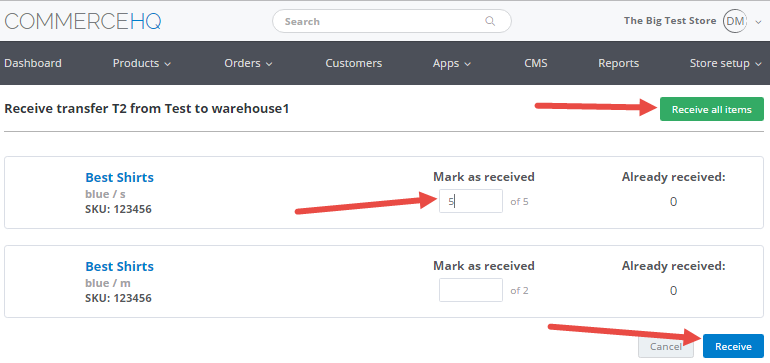
Enter the number of items or click Receive all items
- Click Receive. When you go back to the Transfers page, the additional items transferred is reflected on the Transfer record. For example, if your existing record had 20 items and you receive 5 transferred items, the Transfer record will add the received items (5) to the existing record, increasing stock of the product to 25 items.
Archiving a Transfer Record
To prevent transfers from crowding your workspace and interfering with your efficiency, we recommend regularly archiving transfer records once successfully completed. Archived transfers are not editable and viewable.
- On the Transfers page, search for the transfer you want to archive, then click the button to the right.
- Click Archive. If the operation is successful, a notification message is displayed on top.
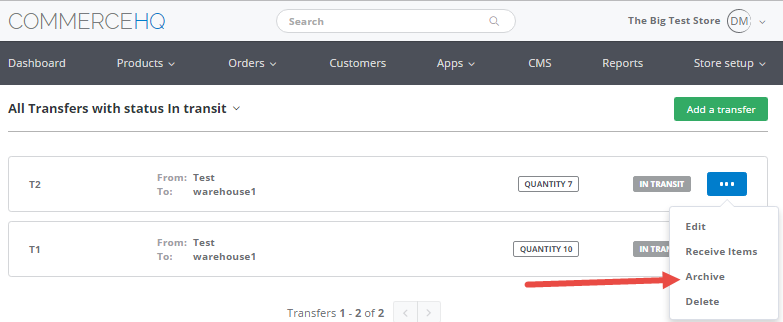
Click Archive
Unarchiving a Transfer Record
Archived records can be unarchived, in case you want to look at the details within the archived transfer record. These records can then be edited, if required.
- On the Transfers page, search for the transfer you want to unarchive, then click the button to the right.
- Click Unarchive. If the operation is successful, a notification message is displayed on top.
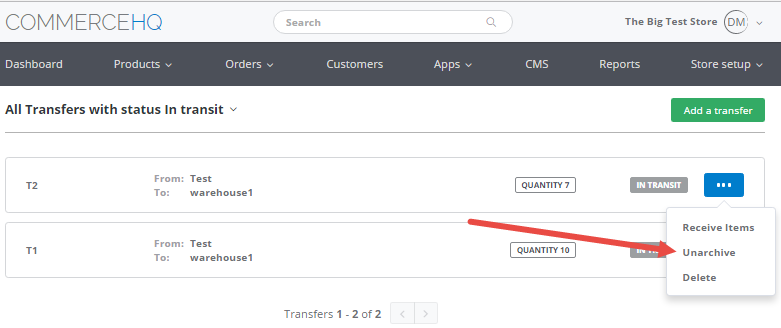
Click Unarchive
Deleting a Transfer Record
Transfer records can be permanently deleted.
- On the Transfers page, search for the transfer you want to delete, then click the button to the right.
- Click Delete. If the operation is successful, a notification message is displayed on top.
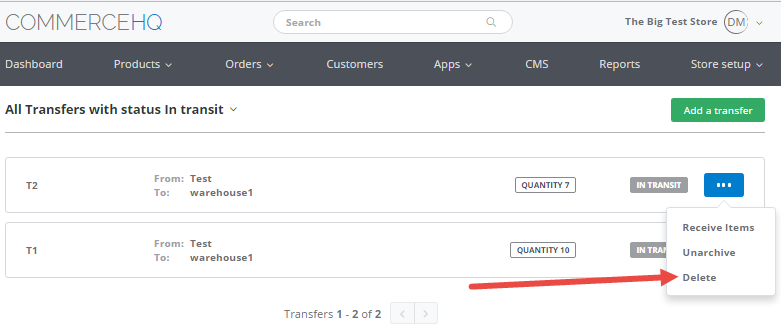
Click Delete
Updated over 6 years ago
