Inventory
Managing Inventory
The Inventory page can be accessed from Products>Inventory on your Admin panel. It shows all products on your storefront for which inventory tracking is turned on.
The number of products added to or removed from your storefront are not tracked by default. When adding products, a product's Inventory policy must be set to Track Inventory for the product to appear on the Inventory page (for more details, see Products).
Once inventory tracking is turned on for a product, all sales of the product on your storefront is automatically deducted from your inventory. This is true for product returns as well.
For inventory tracking to work, you should already have linked a warehouse or two to your account.
- Understanding Inventory Status
- Adding Stock
- Removing Stock
- Initializing Stock
- Viewing Available Stock
Understanding Inventory Status
There are four available statuses for products that have inventory tracking turned on.
- Available = On hand stock - committed stock
- On hand = Stock currently available at the warehouse
- Committed = Stock that has been sold but have not yet shipped
- Incoming = Stock on the way from a supplier
You will see the summary for each of these statuses to the right of a product on the Inventory page.
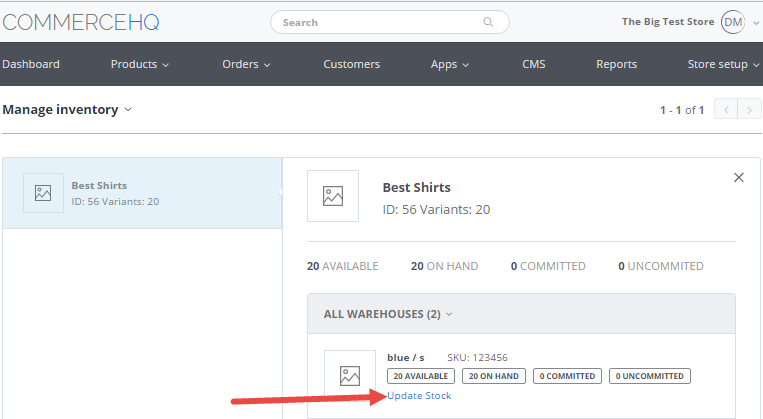
The Different Inventory Statuses
Adding Stock
- On your Admin panel, click Products>Inventory.
- On the Manage Inventory page, the list of products with inventory tracking turned on is displayed, together with summary inventory information about each product. Click a product on the list.
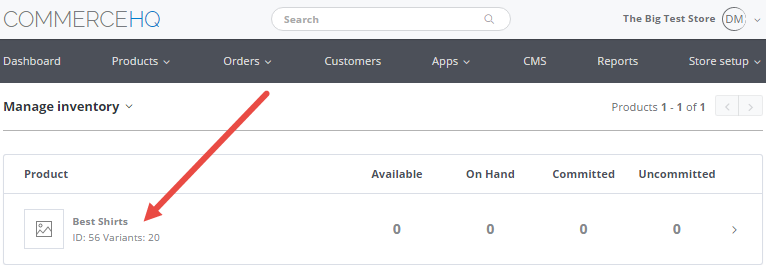
Click a Product
- Click the Update Stock link at the bottom of the product item/variant.
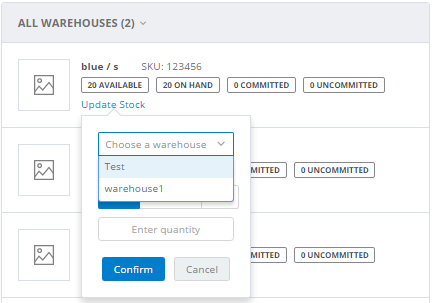
Click Update Stock
- Select a warehouse from the list, click Add, then enter the quantity to be added to the product's stock.
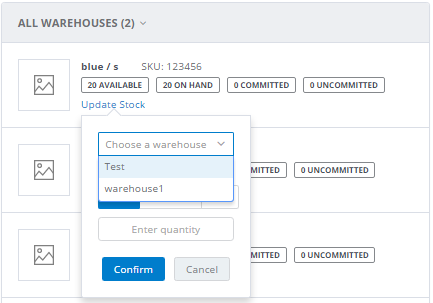
Click Add
- Click Confirm to add the stock to the existing inventory.
Removing Stock
- On your Admin panel, click Products>Inventory.
- On the Manage Inventory page, the list of products with inventory tracking turned on is displayed, together with summary inventory information about each product. Click a product on the list.
- Click the Update Stock link at the bottom of the product item/variant.
- Select a warehouse from the list, click Remove, then enter the quantity to be removed from the product's stock.
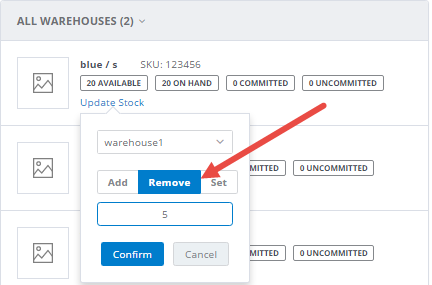
Click Remove
- Click Confirm to remove the stock from the existing inventory.
Initializing Stock
- On your Admin panel, click Products>Inventory.
- On the Manage Inventory page, the list of products with inventory tracking turned on is displayed, together with summary inventory information about each product. Click a product on the list that currently does not have any available stock.
- Click the Update Stock link at the bottom of the product item/variant.
- Select a warehouse from the list, click Set, then enter the quantity to be added to the product's stock.
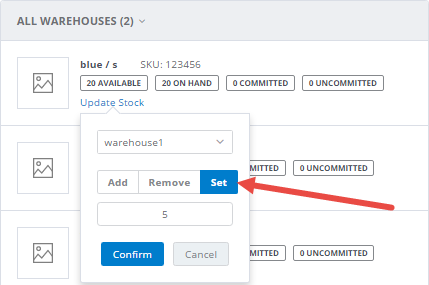
Click Set, then add the quantity to be added to stock
- Click Confirm to set the product's initial stock.
Setting Initial Stock of a New Product or Resetting Stock from 0
Clicking the Set button initializes or reinitializes the stock. For products that already had stock before, this resets the number back to 0, then adds the quantity entered to inventory. For example, if you have 20 items on hand, then you set stock to 10 items, the 20 items are set to 0, then the new stock on hand becomes 20 items.
Viewing Available Stock
By default, the Inventory page displays inventory information for all your products. You can apply a filter on the Inventory page to display only certain products.
- To View Available Stock of a Product
- To View Available Stock in Warehouses
- To Switch Between Warehouses
- To View Remaining Stock of a Product
- To Save a View
- To Run a Saved View
- To Reset a Filter to the Default View
To View Available Stock of a Product
- On your Admin panel, click Products>Inventory.
- On the Manage Inventory page, a list of all products with inventory tracking turned on is displayed, together with summary inventory information about each product. To apply a filter on the page, click the Manage inventory link at the top.
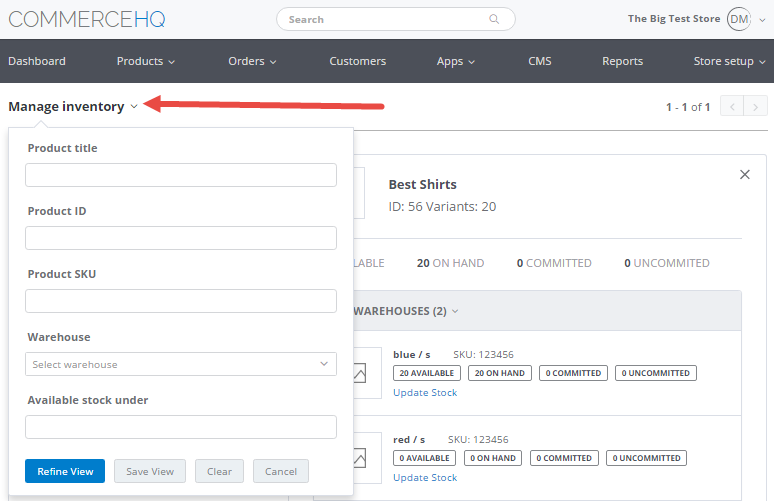
Click the Manage Inventory link
- Enter a product title, ID, or SKU to filter the products by those values.
- Click Refine View. The products that meet the filter criteria you entered in Step 3 above are then displayed on the screen.
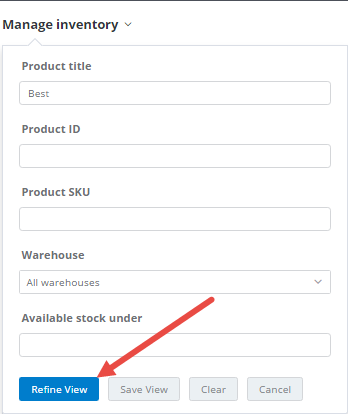
Click Refine View
To View Available Stock in Warehouses
- On your Admin panel, click Products>Inventory.
- On the Manage Inventory page, a list of all products with inventory tracking turned on is displayed, together with summary inventory information about each product. To apply a filter on the page, click the Manage inventory link at the top.
- Select a warehouse from the list to filter the products by warehouse.
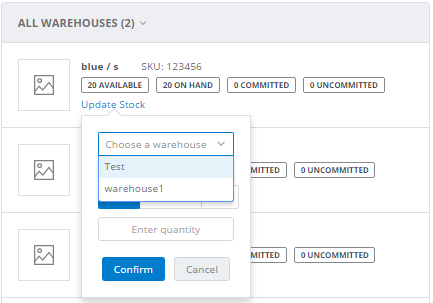
Select a warehouse from the list
- Click Refine View. The products that meet the filter criteria you entered in Step 3 above are then displayed on the screen.
To Switch Between Warehouses
- On your Admin panel, click Products>Inventory.
- On the Manage Inventory page, a list of all products with inventory tracking turned on is displayed, together with summary inventory information about each product. To apply a filter on the page, click the Manage inventory link at the top.
- Select a warehouse from the list to filter products by warehouse.
- Select another warehouse from the list to filter products by that warehouse.
To View Remaining Stock of a Product
You can also search for the remaining stock of a product by entering a number that will tell CommerceHQ to look for products with stock equal to or lower than the number.
- On your Admin panel, click Products>Inventory.
- On the Manage Inventory page, a list of all products with inventory tracking turned on is displayed, together with summary inventory information about each product. To apply a filter on the page, click the Manage inventory link at the top.
- On the Available stock under box, enter a number that will tell CommerceHQ to look for products with stock equal to or lower than the number.
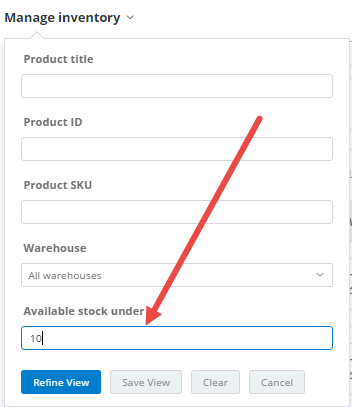
Enter a number on the Available Stock Under box
- Click Refine View.
To Save a View
Views of product inventory to which filters have been applied can be saved. These saved views can then be used to filter the Inventory page in the future.
- Apply a filter on the Inventory page (see To View Available Stock of a Product, To View Available Stock in a Warehouse, and To View Remaining Stock of a Product).
- Click Save View to add to your list of saved views.
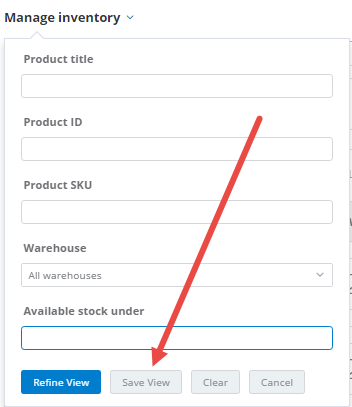
Click Save View
To Run a Saved View
- Click the Manage Inventory link at the top of the Inventory page.
- Click a saved view from the list of saved views.
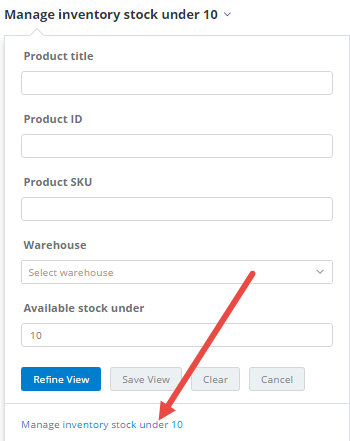
Click a Saved View from the List
To Reset a Filter to the Default View
Click Clear to reset the filter to the default Manage Inventory view, which lists all products that have inventory tracking turned on.
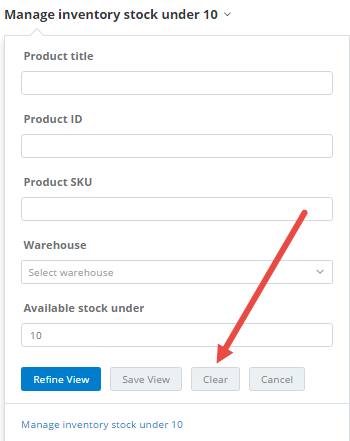
Click Clear to reset filter to default view
Updated almost 7 years ago
